8 Healthy Homemade Dehydrated Dog Treats for Long-Lasting Chews
Let’s be honest—you’ve probably stood in the pet store aisle, squinting at tiny ingredient labels, wondering what half those words even mean. Xanthan gum? BHA? Propylene glycol? These mystery ingredients show up in way too many commercial dog treats, and they’re not doing your furry friend any favors.
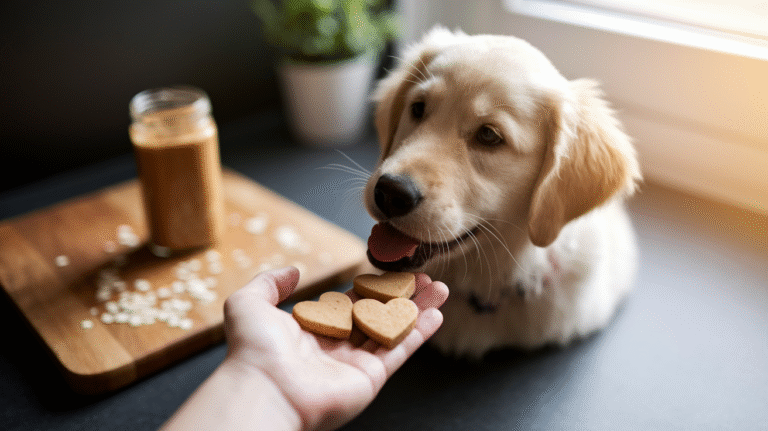
Here’s the good news: you can skip the guesswork entirely by making your own dehydrated dog treats at home. I’m talking about simple, wholesome chews made from real ingredients you can actually pronounce. No preservatives, no artificial colors, and definitely no mystery meat.
In this guide, you’ll discover 8 proven recipes that transform everyday ingredients into tail-wagging treats your dog will absolutely love. We’re covering everything from classic sweet potato chews to protein-packed chicken jerky strips—all designed to be long-lasting, budget-friendly, and ridiculously easy to make.
The benefits? You’ll save serious money (we’re talking 50-70% compared to premium store-bought treats), gain complete control over what goes into your pup’s snacks, and reduce food waste by using leftover vegetables and meat scraps. Plus, dehydrated treats last 2-3 months when stored properly, so one afternoon of prep keeps your treat jar stocked for weeks.
Ready to become your dog’s favorite chef? Let’s dive in.
Why Dehydrated Dog Treats Are the Perfect Choice for Your Pup
Health Benefits That Make a Real Difference
Dehydrated treats deliver concentrated nutrition without any of the junk. When you remove water from whole foods through dehydration, you’re left with pure, nutrient-dense goodness. No artificial preservatives needed—the dehydration process itself prevents bacterial growth and extends shelf life naturally.
This matters because commercial treats often rely on chemical preservatives like BHA and BHT to stay fresh. These additives have raised health concerns in multiple studies, yet they’re still common in many popular brands. With homemade dehydrated treats, you eliminate this risk entirely.
The concentrated nutrients in dehydrated treats also mean easier digestion for most dogs. Sweet potatoes become more bioavailable when dehydrated, making their vitamin A and fiber content easier for your dog’s system to process. Turkey and chicken retain their complete protein profile while becoming shelf-stable without refrigeration.
For dogs with food sensitivities or allergies, dehydrated treats are a game-changer. You control every single ingredient, which means you can avoid common allergens like corn, wheat, and soy that show up in countless commercial options. If your dog needs grain-free, single-ingredient treats, you can make them in your own kitchen for pennies.
Long-Lasting Chews That Save You Money
Here’s where the math gets exciting. A bag of premium sweet potato chews at the pet store runs about $12-15 for maybe 8-10 ounces. You can make the same amount at home for roughly $2-3 worth of sweet potatoes. That’s an 80% savings right there.
But the benefits go beyond just cost. Dehydrated treats last significantly longer than fresh or baked alternatives. Properly stored in airtight containers, they maintain quality for 2-3 months at room temperature, or up to 6 months in the freezer. One batch-cooking session yields dozens of treats that stay fresh for months.
You’re also reducing food waste in a meaningful way. Those turkey stock vegetables you’d normally toss? Perfect for dehydrated treats. The chicken breast that’s been in your freezer a bit too long? Slice it into jerky strips. The slightly bruised banana or the sweet potato that sprouted? Still excellent for dehydrating.
Simple Equipment You Probably Already Have
Don’t let equipment concerns stop you. While a dedicated dehydrator makes the process easier, it’s absolutely not required to get started. Your regular oven works perfectly fine—you’ll just set it to the lowest temperature (around 170-200°F) and prop the door open slightly to allow moisture to escape.
If you do invest in a dehydrator, expect to spend $40-80 for a reliable model that’ll last for years. The Nesco or Presto brands offer excellent entry-level options with multiple trays and adjustable temperature controls.
Beyond that, you need basic kitchen tools you already own: a cutting board, a sharp knife for uniform slicing, and airtight containers for storage. That’s it. No specialty equipment, no complicated gadgets, no expensive add-ons required.
Essential Tips for Dehydrating Dog Treats Successfully
Choosing the Right Ingredients
Safe ingredient selection is non-negotiable. Stick with dog-friendly whole foods that dehydrate well and provide nutritional benefits. Sweet potatoes, carrots, and pumpkin are vegetable superstars—they’re packed with vitamins, fiber, and natural sweetness dogs love. For protein options, lean meats like turkey, chicken, and beef work beautifully.
Fruits like bananas and apples (without seeds) make excellent training treats because they dehydrate into small, portable pieces. Just remember to remove apple cores completely, as seeds contain trace amounts of cyanide that can accumulate over time.
Now for the critical part—foods you must avoid. Grapes and raisins are toxic to dogs, causing kidney failure even in small amounts. Onions and garlic damage red blood cells, leading to anemia. Avocados contain persin, which causes digestive upset. Macadamia nuts, chocolate, and anything with xylitol (artificial sweetener) are also completely off-limits.
The organic versus conventional debate matters less than you’d think for dehydrated treats. Yes, organic produce eliminates pesticide exposure, which is ideal. But if budget constraints make organic unrealistic, thoroughly washing conventional produce removes most surface residues. The real win is making treats from whole foods instead of processed ingredients—that’s where the health benefits truly come from.
Proven Preparation Techniques
Uniform slicing is the secret to perfectly dehydrated treats. When pieces are different thicknesses, some finish too quickly while others stay undercooked. Aim for consistent slices between 1/8″ and 3/8″ thick, depending on whether you want crunchy chips or chewier strips.
For vegetables like sweet potatoes and carrots, a mandoline slicer ensures perfect uniformity every time. If you’re slicing by hand, take your time and use a sharp knife—dull blades create uneven cuts and make the job harder.
Meat requires extra attention to food safety. Always start with fresh, high-quality meat from reliable sources. Trim visible fat, as it can turn rancid during storage. Slice against the grain for tender jerky, or with the grain for chewier strips. Pat meat dry with paper towels before dehydrating to reduce processing time.
Wash all produce thoroughly, even if you’re peeling it. Bacteria on the surface can transfer to your knife and cutting board. For root vegetables, use a vegetable brush to scrub away dirt. Remove any green spots on potatoes, as they contain solanine, a toxic compound.
Dehydration Methods That Work
Dehydrator settings vary by ingredient thickness and moisture content. Vegetables typically dehydrate at 125-135°F for 6-12 hours. Meat requires higher temperatures (155-165°F) for food safety, running 4-8 hours depending on thickness. The goal is to remove all moisture without cooking the ingredients.
For oven dehydration, set your temperature to the lowest setting—ideally 170°F or below. Place sliced ingredients on wire cooling racks set over baking sheets (this allows air circulation on all sides). Prop the oven door open about 2-3 inches with a wooden spoon to let moisture escape. Oven dehydration typically takes 25-50% longer than using a dedicated dehydrator.
Air fryers work surprisingly well for small batches. Set the temperature to 130-150°F (if your model goes that low) and check every 30 minutes. The compact space and efficient air circulation can actually speed up the process.
Testing for doneness is straightforward. For chewy treats, they should bend without breaking and feel leathery. For crunchy treats, they should snap cleanly when bent. If you see any moisture beading up when you press the treat, it needs more time. Properly dehydrated treats should feel completely dry to the touch with no soft or spongy areas.
8 Amazing Dehydrated Dog Treat Recipes Your Pup Will Love
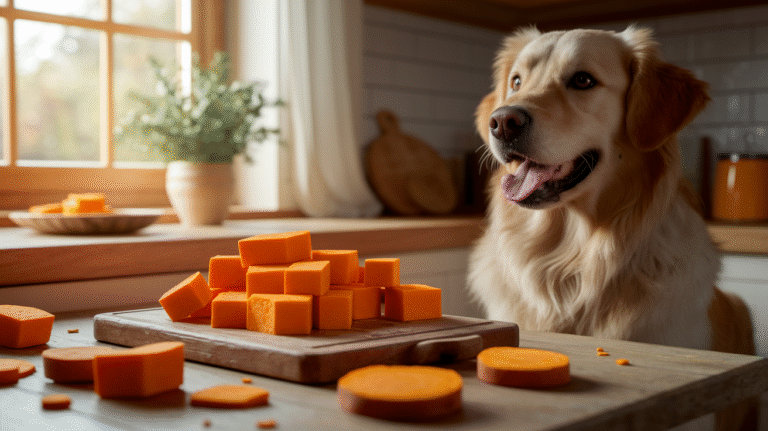
Sweet Potato Chews (The Classic Favorite)
This is the ultimate beginner recipe—literally just sweet potatoes and nothing else. Scrub 2-3 large sweet potatoes clean (no need to peel), then slice them into 1/4″ rounds or strips. Lay them on dehydrator trays in a single layer, making sure pieces don’t overlap.
Dehydrate at 135°F for 8-12 hours, checking periodically. For chewy treats that bend without breaking, pull them around the 8-hour mark. For crunchy chips that snap, let them go the full 12 hours.
The beauty of sweet potato chews is their versatility. Slice them into rounds for larger dogs who love a good chewing session, or cut them into thin strips for smaller breeds. They’re naturally sweet, loaded with vitamin A and fiber, and dogs go absolutely crazy for them.
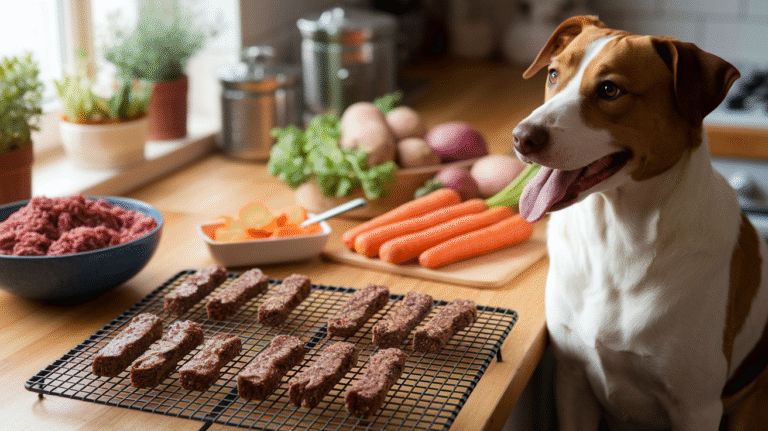
Turkey & Veggie Power Bites
Here’s how to transform leftover turkey stock vegetables into nutritious treats. After making homemade turkey stock, save the cooked turkey meat, carrots, celery, and sweet potatoes. Puree everything together in a food processor until smooth—you want a thick, spreadable consistency.
Spread the mixture about 1/4″ thick on dehydrator trays lined with non-stick sheets or parchment paper. Dehydrate at 145°F for 6-8 hours until completely dry and firm. Once done, break into bite-sized pieces.
These power bites pack complete nutrition—protein from turkey, vitamins from vegetables, and zero waste from your cooking. They’re perfect for training sessions because you can break them into tiny pieces that won’t fill up your dog too quickly.
Banana Chip Delights
Slice 3-4 ripe bananas into 1/4″ rounds. That’s it—no other ingredients needed. Arrange on dehydrator trays and dry at 135°F for 6-8 hours until crispy.
The natural sweetness makes these irresistible for training. They’re lightweight, portable, and small enough to reward without overfeeding. Plus, bananas provide potassium and vitamin B6, supporting muscle and nerve function.
For variety, try slicing bananas lengthwise into chips instead of rounds. The larger surface area creates a crunchier texture that some dogs prefer.
Carrot Crunchies
Wash and peel 5-6 large carrots, then slice into 1/8″ rounds or sticks. Thinner slices create crunchier treats that double as dental chews—the texture helps scrape plaque from teeth as your dog chews.
Dehydrate at 135°F for 8-10 hours until completely crisp. These should snap easily when bent. Carrots are high in beta-carotene and fiber, making them both nutritious and satisfying.
The crunchy texture makes these ideal for dogs who love to gnaw. They last forever in storage and cost almost nothing to make.
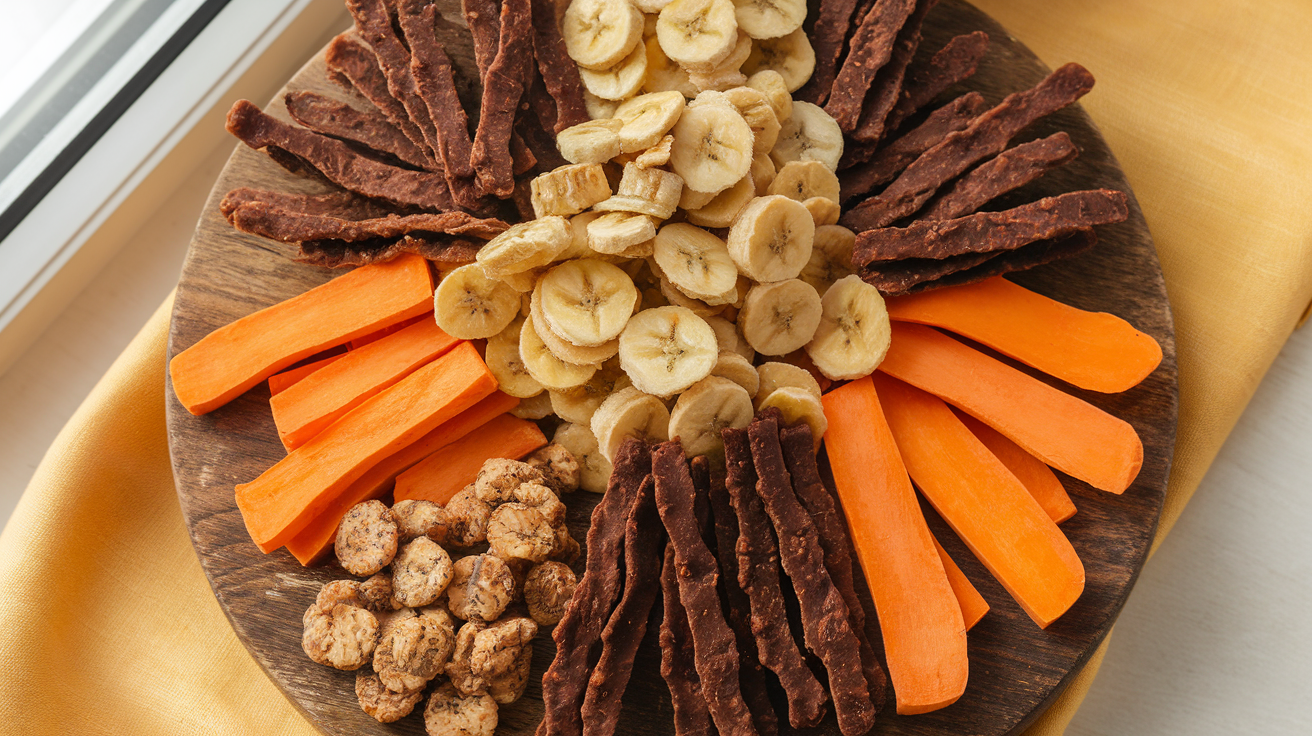
Chicken Jerky Strips
Start with 2 pounds of boneless, skinless chicken breast. Trim all visible fat, then slice into 1/4″ strips. For easier slicing, partially freeze the chicken for 30-60 minutes first—it firms up just enough to cut cleanly.
Arrange strips on dehydrator trays without overlapping. Dehydrate at 165°F for 4-6 hours until completely dry and slightly brittle. The higher temperature ensures food safety by eliminating any potential bacteria.
Chicken jerky delivers pure protein without fillers or additives. It’s perfect for high-value rewards during training sessions. Store in the refrigerator for maximum freshness, as lean meat treats can develop off-flavors at room temperature over time.
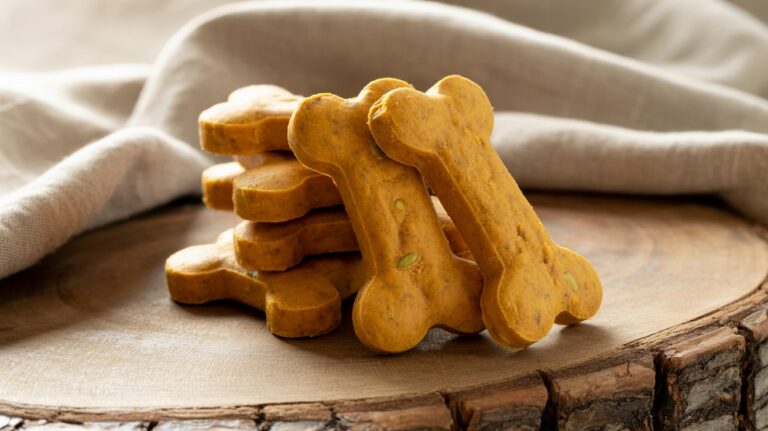
Pumpkin & Carrot Combo Chews
Mix 1 cup pure pumpkin puree (not pie filling) with 2 cups shredded carrots in a food processor until smooth. Spread 1/4″ thick on lined dehydrator trays and dry at 135°F for 8-10 hours.
This combination is fantastic for digestive health. Pumpkin provides soluble fiber that helps regulate digestion, while carrots add vitamins and crunch. Break into small squares for easy portioning.
These seasonal treats are especially popular in fall, but the ingredients are available year-round. They’re gentle on sensitive stomachs and work well for dogs with digestive issues.
Apple Rings (Sweet & Healthy)
Core 4-5 apples and slice into 1/4″ rings. Remove all seeds and the core completely—apple seeds contain amygdalin, which converts to cyanide when digested. Arrange rings on trays and dehydrate at 135°F for 6-8 hours.
Apple rings naturally freshen breath thanks to their crisp texture and natural enzymes. The chewing action helps clean teeth while the natural sweetness makes them highly rewarding.
Thin slices (1/8″) create crispy chips perfect for training. Thicker slices (3/8″) offer more chewing satisfaction for dogs who love to gnaw.
Mixed Veggie Medley
This is your zero-waste recipe. Collect leftover vegetables throughout the week—carrots, green beans, sweet potatoes, zucchini, celery. Chop everything into uniform pieces or puree together for a spreadable mixture.
For sliced vegetables, dehydrate at 135°F for 6-10 hours depending on thickness. For pureed mixtures, spread thin and dry for 8-12 hours.
The beauty here is flexibility. Use whatever dog-safe vegetables you have on hand. Each batch turns out slightly different, giving your dog variety while you reduce food waste.
Storage, Safety, and Serving Guidelines
Proper Storage for Maximum Freshness
Airtight containers are absolutely essential. Exposure to air and humidity causes treats to soften and potentially develop mold. Glass jars with rubber-sealed lids work perfectly, as do vacuum-sealed bags for long-term storage.
Room temperature storage works fine for most dehydrated treats, keeping them fresh for 2-3 months. Store containers in cool, dark places like pantries or cabinets—avoid areas near stoves or in direct sunlight, as heat degrades quality.
Refrigeration extends shelf life to 4-5 months and is recommended for meat-based treats like chicken jerky. The cold temperature prevents any residual fat from turning rancid.
Freezing is your best option for maximum longevity. Properly dehydrated treats last 6+ months in the freezer without quality loss. Portion them into weekly amounts so you’re only thawing what you need.
Watch for signs of spoilage: visible mold (fuzzy spots), off odors, or moisture accumulation in the container. If treats feel soft or sticky when they should be dry, they’ve absorbed moisture and need to be discarded or re-dehydrated immediately.
Safe Serving Sizes and Frequency
The 10% rule is your guideline: treats should comprise no more than 10% of your dog’s daily caloric intake. For a 50-pound dog eating 1,000 calories daily, that’s roughly 100 calories from treats—about 3-4 large sweet potato chews or 8-10 smaller training treats.
Adjust portions based on your dog’s size, activity level, and weight goals. Active dogs can handle slightly more treats, while overweight dogs need stricter limits. Always account for treat calories by slightly reducing meal portions.
Introduce new treats gradually, especially if your dog has a sensitive stomach. Start with one small piece and wait 24 hours to ensure no digestive upset. Some dogs need a few days to adjust to new ingredients.
Monitor for sensitivities or allergic reactions: excessive scratching, digestive upset, or unusual behavior after eating. If you notice these signs, discontinue that particular treat and consult your veterinarian.
Quick Troubleshooting Tips
Treats too hard? Your dog’s teeth shouldn’t struggle. If treats are rock-solid, reduce dehydration time by 1-2 hours next batch. For already-made treats that are too hard, try steaming them briefly to soften slightly.
Treats too soft or chewy when you wanted crunchy? They need more dehydration time. Pop them back in the dehydrator for another 2-3 hours. Soft treats also indicate moisture remains, which shortens shelf life.
Preventing mold requires complete dehydration and proper storage. If you spot mold on any treats, discard the entire batch—mold spreads invisible spores throughout the container.
Making treats more appealing for picky eaters is simple: add a sprinkle of parmesan cheese to vegetable purees before dehydrating, or use bone broth instead of water when making mixed recipes. The extra flavor often wins over hesitant dogs.
Adjusting chewiness comes down to thickness and dehydration time. Thicker slices (3/8″) dehydrated for shorter periods (6-8 hours) stay chewier. Thinner slices (1/8″) dehydrated longer (10-12 hours) become crunchier.
Conclusion
Making healthy dehydrated dog treats at home is genuinely simple, remarkably cost-effective, and incredibly rewarding. You’re giving your dog wholesome, preservative-free snacks made from real ingredients you control completely—no mystery additives, no questionable sourcing, just pure nutrition.
Your pup will experience the benefits immediately: better digestion from whole foods, concentrated nutrients in every bite, and treats perfectly tailored to their preferences and dietary needs. You’ll enjoy the peace of mind that comes from knowing exactly what your furry friend is eating, plus the significant savings compared to premium store-bought options.
Start with sweet potato chews this weekend—they’re foolproof for beginners and universally loved by dogs. Slice a few sweet potatoes, pop them in your dehydrator or oven, and in less than 12 hours, you’ll have a jar full of healthy treats that’ll last for weeks.
The ultimate gift you’re giving your pup isn’t just healthier treats—it’s the care and attention that goes into making something specifically for them. That matters more than any ingredient list.
Try your first batch this weekend, and watch your dog’s reaction when they taste something made with real love and quality ingredients. Share your results with other dog parents, and pin this guide for quick reference whenever you’re ready to make another batch. Your dog’s tail is about to do a lot more wagging.