7 Essential Puppy Commands to Teach First
Imagine this: Your puppy spots a squirrel across the street and starts to dart into traffic. You call their name, and they instantly turn around and run back to you.
Or picture this: You’re at the vet’s office, and your puppy calmly sits while the veterinarian examines them, making the whole experience stress-free for everyone involved.
These aren’t fantasy scenarios reserved for perfectly trained show dogs—they’re real-life situations that every puppy parent can achieve with the right foundation of basic commands.
Teaching your puppy essential commands isn’t just about having a well-mannered dog who impresses your friends (though that’s definitely a nice perk). It’s about safety, communication, and building a strong bond with your furry companion.
Commands like “come” can literally save your dog’s life in dangerous situations. Commands like “sit” and “stay” make everyday activities—from vet visits to meeting new people—infinitely easier and less stressful.
The beautiful truth about puppy training is that young dogs are learning sponges. Between 8 and 16 weeks, puppies are in their critical socialization and learning period, making this the perfect time to establish good habits and teach foundational skills.
The commands you teach now will form the building blocks for all future training, whether that’s advanced tricks, therapy dog certification, or simply being a pleasant companion in everyday life.
But where do you start? With hundreds of possible commands and tricks, which ones truly matter most? In this comprehensive guide, we’ll walk through the seven essential puppy commands that every dog should know.
These aren’t random party tricks—they’re carefully selected commands that serve crucial safety and practical purposes in your daily life together.
Whether you’re a first-time puppy parent or adding another furry member to your experienced dog household, these seven commands will set you and your puppy up for a lifetime of success, safety, and wonderful companionship. Let’s dive in!
Quick Overview: The 7 Essential Puppy Commands
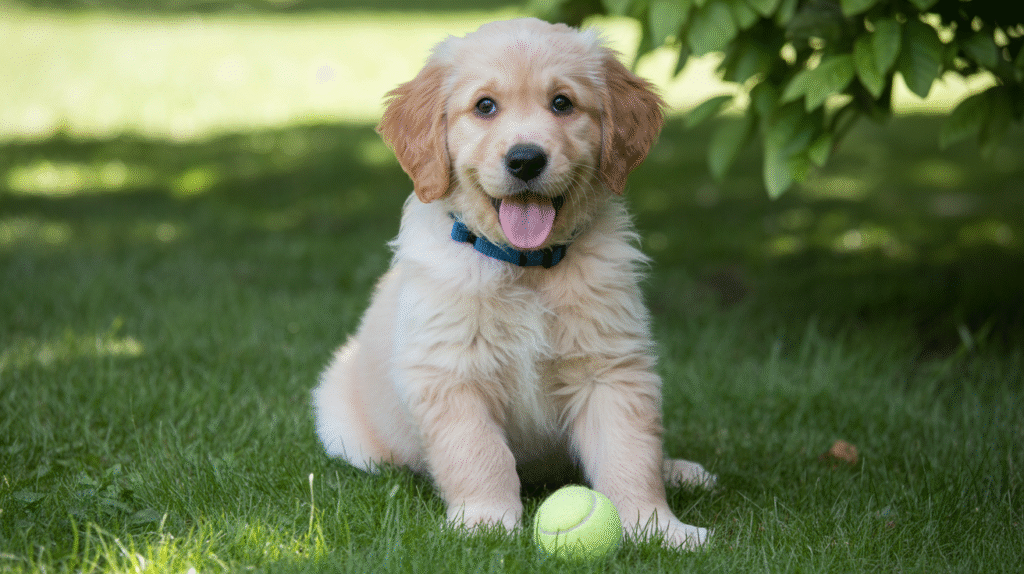
Before we explore each command in detail, here’s your quick reference guide to the foundational commands every puppy needs:
- Sit – The gateway command that teaches impulse control
- Stay – Builds patience and keeps your puppy safe in various situations
- Come (Recall) – The most important safety command every dog must know
- Down – Teaches calmness and helps in many real-world scenarios
- Leave It – Prevents your puppy from picking up dangerous items
- Drop It – Gets your puppy to release items from their mouth
- Heel (Loose Leash Walking) – Makes walks enjoyable instead of exhausting
Now let’s break down exactly how to teach each command, why it matters, and how to troubleshoot common challenges.
Command 1: Sit
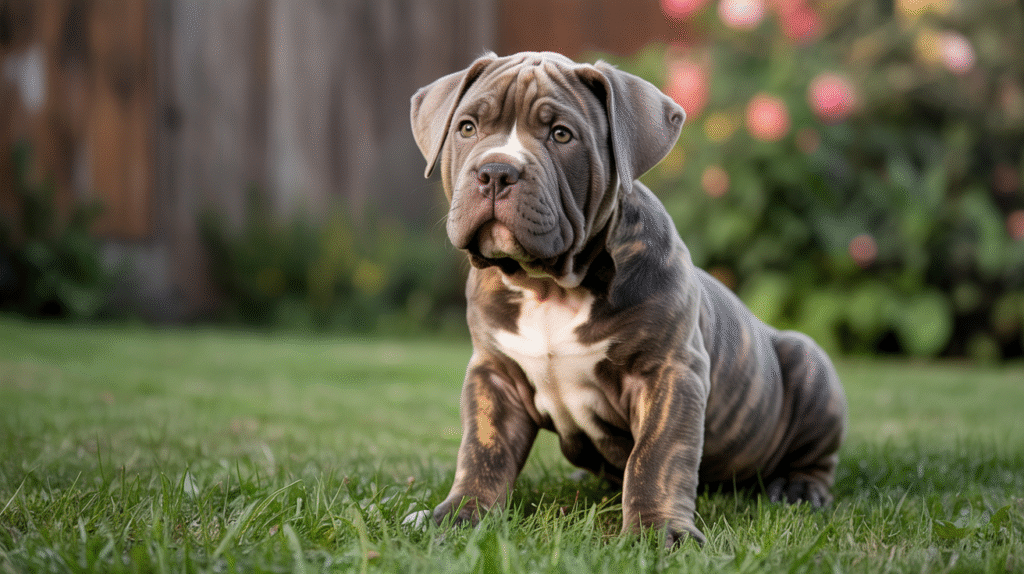
Why This Command Is Essential: “Sit” is often the first command puppies learn, and for good reason. It’s simple, quick to teach, and incredibly useful in countless real-life situations.
Beyond just being polite, “sit” teaches your puppy impulse control—the ability to pause and think instead of immediately reacting.
You’ll use “sit” before meals, when greeting people, before going through doors, during vet visits, and in countless other daily scenarios.
Real-Life Benefits:
- Prevents jumping on guests or strangers
- Creates calm behavior before meals
- Keeps your puppy safe before crossing streets
- Makes grooming and vet exams easier
- Provides an alternative behavior when your puppy is getting overexcited
Step-by-Step Training Instructions:
Method 1: Lure Method (Easiest for Puppies)
- Get your puppy’s attention with a small, soft training treat held between your thumb and fingers.
- Hold the treat at your puppy’s nose level, letting them sniff but not take it. Say their name to ensure they’re focused.
- Slowly move the treat up and back over your puppy’s head, toward their tail. Their nose should follow the treat upward. As their head goes up, their bottom naturally goes down.
- The moment their bottom touches the ground, say “yes!” or click your clicker, and immediately give them the treat with enthusiastic praise.
- Don’t say “sit” yet. First, let your puppy learn the physical action. After 5-10 successful repetitions, start saying “sit” just as their bottom is about to touch the ground.
- Practice 5-10 repetitions per session, 2-3 times daily. Keep sessions short and fun—30 seconds to 2 minutes max for young puppies.
- Gradually phase out the lure. After a few days, start using an empty hand with the same motion. Reward from your other hand or pocket after they sit.
- Add duration slowly. Once your puppy sits reliably, ask them to hold the position for 2 seconds, then 3, then 5, before treating.
Method 2: Capture Method (For Patient Trainers)
- Watch your puppy throughout the day with treats ready.
- The instant they sit on their own (which puppies do naturally), say “yes!” and give a treat.
- After several captures, your puppy will start offering sits to get treats. Now add the word “sit” right before they do it.
- This method takes longer but teaches your puppy to think and problem-solve.
Common Mistakes and Troubleshooting:
Mistake: Pushing your puppy’s bottom down. This often makes puppies resist or stand back up. Let the lure guide them naturally into position.
Mistake: Holding the treat too high. If your puppy jumps up instead of sitting, you’re holding the treat too high. Keep it closer to their head, moving it backward not upward.
Mistake: Treating too slowly. Timing is everything. The treat must arrive within 1-2 seconds of their bottom hitting the floor, or they won’t connect the action with the reward.
Troubleshooting: My puppy backs up instead of sitting. Practice with their back against a wall so they can’t back up. Or try the capture method instead.
Troubleshooting: My puppy keeps standing up immediately. You’re likely leaning over them, which is intimidating. Stand upright or kneel beside them instead of hovering above.
Reinforcing in Daily Life:
Make “sit” part of your daily routine:
- Ask for a sit before putting their food bowl down
- Request a sit before throwing a toy
- Have them sit before you open doors
- Practice sits before putting on or taking off the leash
- Ask for a sit when greeting new people or dogs (with permission)
The more you integrate “sit” into everyday life, the more reliable it becomes. Soon, your puppy will offer sits automatically when they want something—they’re learning to say “please”!
Command 2: Stay
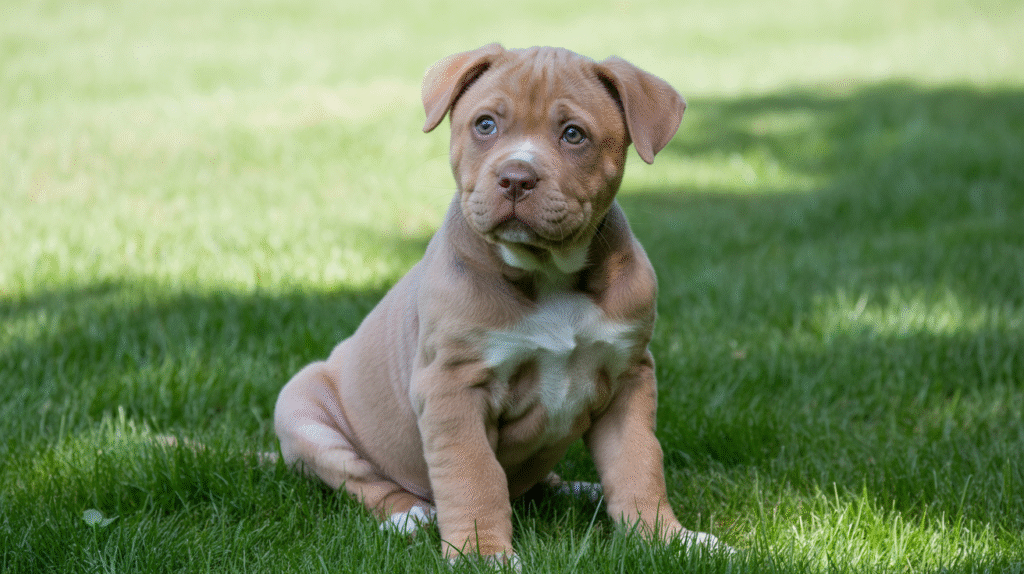
Why This Command Is Essential: “Stay” is your puppy’s pause button. It teaches patience, self-control, and the ability to maintain a position even when tempted to move.
This command is crucial for safety (preventing your dog from running out doors or into streets), convenience (keeping them in place during grooming or vet visits), and as a foundation for advanced training.
Real-Life Benefits:
- Keeps your puppy safe at doorways and street crossings
- Allows you to set down their food without chaos
- Makes vet and grooming appointments manageable
- Prevents rushing guests at the door
- Creates calm behavior in stimulating environments
- Essential for off-leash reliability
Step-by-Step Training Instructions:
Foundation: Master “Sit” First Your puppy should reliably know “sit” before learning “stay.” “Stay” is an extension of “sit”—they’re learning to hold the sitting position.
- Start in a quiet, distraction-free environment. Your living room with no other pets or people is ideal.
- Ask your puppy to sit. Once they’re sitting, hold your palm up in a “stop” gesture in front of their face (but not touching them).
- Say “stay” in a calm, firm voice. Don’t repeat it—say it once clearly.
- Count to 3 in your head while your puppy remains sitting. If they stay, say “yes!” and give a treat while they’re still sitting.
- Release with a release word. After treating, say “okay!” or “free!” in an upbeat voice and take a step back, encouraging them to move. This teaches them when the stay is over.
- If your puppy breaks the stay before you release them, simply say “uh-oh,” guide them back to the original spot, and try again with a shorter duration (maybe 2 seconds instead of 3).
- Gradually increase duration. Once your puppy can stay for 5 seconds consistently, try 7 seconds, then 10, then 15. Move slowly—rushing leads to failure.
- Add distance slowly. Once they can stay for 10-15 seconds with you standing right in front of them, take one small step back, return immediately, and reward. Gradually increase the distance one step at a time.
- Add distractions last. Only after your puppy can stay with duration and distance should you add mild distractions like bouncing a ball or having someone walk by.
The Three D’s: Duration, Distance, Distractions
Never increase more than one “D” at a time. For example:
- If you increase distance (step further away), decrease duration (shorter time) and remove distractions
- If you add distractions (turn on TV), decrease distance (stand close) and duration (shorter time)
Common Mistakes and Troubleshooting:
Mistake: Moving too fast. This is the #1 reason “stay” fails. If your puppy can’t hold a 10-second stay, they’re definitely not ready for a 30-second stay. Build gradually.
Mistake: No release word. Without a release word, your puppy won’t know when “stay” is over and may break position randomly. Always end with “okay” or “free.”
Mistake: Repeating “stay” over and over. Say it once at the beginning. Repeating teaches your puppy to ignore the first command and wait for the third or fourth.
Mistake: Rushing back when they move. If your puppy breaks position, calmly guide them back to the exact spot without emotion. Making a big deal out of it makes them more likely to break again.
Troubleshooting: My puppy won’t stay for even 2 seconds. Your puppy may not fully understand “sit” yet. Go back and solidify sit first. Also, ensure you’re not using an excited tone—”stay” should be calm and steady.
Troubleshooting: My puppy stays when I’m close but breaks when I step away. You increased distance too quickly. Go back to standing right in front of them and build distance in 6-inch increments, not 3-foot steps.
Reinforcing in Daily Life:
- Practice “stay” before putting their food bowl down (start with 3 seconds, build to 10-15)
- Ask for “stay” before opening doors—they must stay until you release them
- Use “stay” when someone knocks at the door before allowing them to greet guests
- Practice at the curb before crossing streets
- Request “stay” during grooming or while you wipe muddy paws
Pro Training Tip: Practice “stay” in different positions (sitting, standing, lying down) and in different locations (living room, yard, on walks). This generalizes the command so your puppy understands “stay” means “freeze in that position” regardless of where they are.
Command 3: Come (Recall)
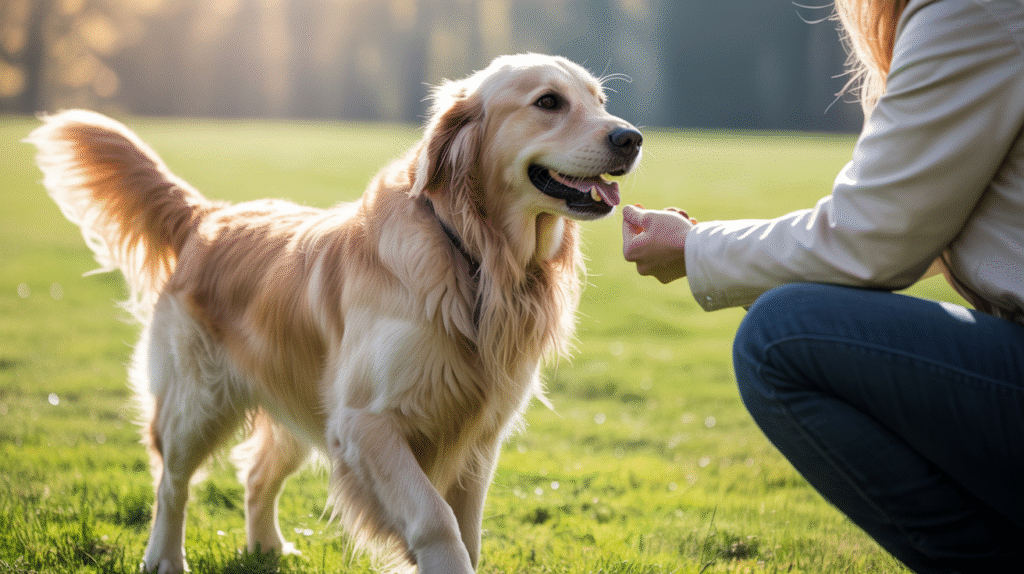
Why This Command Is Essential: Without exaggeration, “come” is the most important command your dog will ever learn. A reliable recall can save your dog’s life—whether they’ve slipped out of their collar, pushed through a door, or are heading toward a dangerous situation. It’s also essential for off-leash freedom, dog park safety, and emergency situations.
Real-Life Benefits:
- Prevents your dog from running into traffic
- Allows safe off-leash time in appropriate areas
- Gets your dog back quickly if they escape
- Essential for emergency situations
- Makes dog park visits safer and more enjoyable
- Reduces anxiety about your dog’s safety
Step-by-Step Training Instructions:
Phase 1: Building Positive Associations (Week 1)
- Choose your recall word carefully. Most people use “come,” but you can use “here” or even your puppy’s name. Whatever you choose, use it consistently and ONLY for recalls, never for punishment.
- Start indoors with zero distractions. Have amazing treats (real chicken, cheese, hot dog pieces—not regular kibble).
- Say your puppy’s name enthusiastically, and when they look at you, say “come!” in a happy, excited voice.
- The moment they take even one step toward you, start praising enthusiastically. “Good come! Yes! Good puppy!”
- When they reach you, have a party! Give 3-5 treats in a row, lots of praise, maybe play with their favorite toy. Coming to you should be THE BEST thing ever.
- Practice 10-15 times per day at random moments when your puppy is already coming toward you anyway. You’re building a positive association.
Phase 2: Adding Distance and Distraction (Week 2-3)
- Move to different rooms. Call your puppy from another room. When they arrive, jackpot with multiple treats.
- Practice in your fenced yard. Let your puppy sniff around, then call them. Big rewards when they come!
- Use a long training leash (15-30 feet) in a safe, enclosed area. Let your puppy wander, then call “come!” If they don’t respond, gently reel them in with the leash while encouraging them. Reward when they reach you.
- Never chase your puppy. If they don’t come, move away from them or run in the opposite direction. This triggers their natural instinct to follow you.
- Practice during play. Call your puppy during a play session, reward them, then immediately resume play. This teaches that coming to you doesn’t mean the fun ends.
Phase 3: Proofing (Week 4+)
- Practice with mild distractions like toys on the ground, another person nearby, or during mealtime.
- Use the “run away” game. Call your puppy and run away from them. Chase is exciting! When they catch you, reward heavily.
- Practice on every walk. Call your puppy randomly, reward, then continue walking. This keeps the command sharp.
- Never call your puppy for something unpleasant. Don’t call them to get a bath, take medicine, or end fun. Go get them instead, or use a different word like “let’s go.”
The Recall Ladder: Difficulty Levels
- Level 1: Indoor, no distractions
- Level 2: Indoor, mild distractions (toys, food on counter)
- Level 3: Fenced yard, no distractions
- Level 4: Fenced yard, mild distractions (sniffing, another person)
- Level 5: On long leash, outdoor location, moderate distractions
- Level 6: Off-leash in enclosed area with high distractions (other dogs, squirrels)
Never move to the next level until your puppy succeeds 90% of the time at the current level.
Common Mistakes and Troubleshooting:
Mistake: Calling repeatedly when your puppy doesn’t respond. This teaches them that “come” doesn’t really mean come—at least not the first time. If they don’t respond on the first command, go get them.
Mistake: Being angry when they finally come. Even if it took 10 minutes and you’re frustrated, when they arrive, you MUST reward enthusiastically. Punishing them when they arrive teaches them not to come.
Mistake: Only calling your puppy to end fun. If “come” always means going inside, ending play, or leashing up, your puppy will avoid you. Call them randomly during fun times and reward, then let them go back to playing.
Mistake: Using boring rewards. Regular kibble won’t cut it for recall training. Use the best treats you can find—real meat, cheese, or whatever your puppy goes crazy for.
Troubleshooting: My puppy comes but stops 5 feet away. Reward them where they are, then lure them the final distance with another treat. Gradually require them to come all the way before treating.
Troubleshooting: My puppy ignores me completely. You’re practicing in too distracting an environment. Go back to easier levels and build up slowly. Also, make yourself more exciting—use a silly voice, crouch down, show the treat.
Reinforcing in Daily Life:
- Call your puppy before every meal (easy win!)
- Practice recalls during every walk
- Call them randomly throughout the day for treats and love
- Use recalls before fun activities (going outside, getting a toy)
- Never, ever call your puppy to punish them
Emergency Recall: Consider teaching a separate “emergency recall” word (like “NOW!” or your puppy’s full name) that you ONLY use in true emergencies and ALWAYS pair with the most amazing rewards. This gives you a backup for life-or-death situations.
Command 4: Down
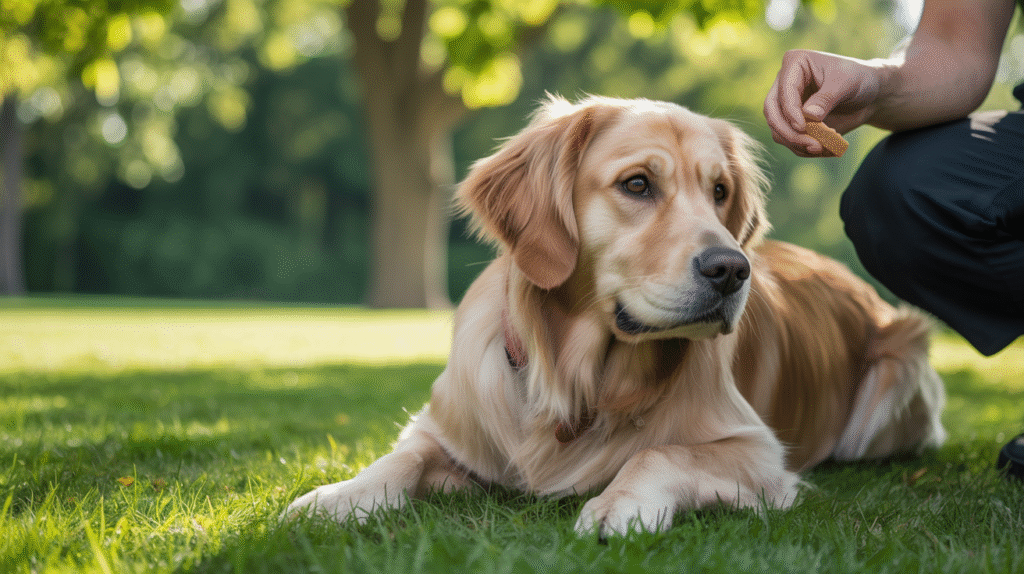
Why This Command Is Essential: “Down” (lying down) is more than just a trick—it’s a powerful tool for managing your dog’s behavior and energy.
Dogs can’t be wild and crazy while lying down, making this command perfect for calming overexcited puppies. It’s also essential for vet visits, grooming, travel, and any situation where you need your dog to settle and relax.
Real-Life Benefits:
- Creates calmness in stimulating situations
- Helpful for vet exams and grooming
- Makes restaurant and café visits possible
- Teaches your dog to relax on command
- Useful for travel (settling in cars, hotels, etc.)
- Builds impulse control and patience
Step-by-Step Training Instructions:
Method 1: Lure from Sit Position
- Start with your puppy in a sit. If they can’t sit reliably yet, master that first.
- Hold a treat at their nose, letting them sniff but not take it.
- Slowly move the treat straight down toward the floor between their front paws. Your puppy’s nose should follow the treat downward.
- As their nose goes down, their elbows should naturally lower. Keep the treat on the ground and slowly move it slightly forward, away from them.
- The moment their elbows and belly touch the floor, say “yes!” or click, and give the treat immediately with lots of praise.
- After 5-10 successful repetitions, start saying “down” just as they’re lowering into position.
- Practice multiple times daily in short sessions (1-2 minutes).
Method 2: Capture the Natural Down
- Watch your puppy throughout the day with treats ready.
- When they naturally lie down, immediately say “yes!” and give a treat.
- After multiple captures, they’ll start offering “down” to get treats. Add the word “down” right before they do it.
Method 3: Shape with a Platform
- Use a low platform, book, or towel as your “down spot.”
- Reward your puppy for interacting with it—first for looking at it, then stepping on it, then lying on it.
- Gradually require full down position on the platform before treating.
- Add the word “down” once the behavior is consistent.
- Generalize by practicing in different locations without the platform.
Common Mistakes and Troubleshooting:
Mistake: Pushing your puppy into a down. Physical manipulation can make puppies resistant and confused. Let the lure guide them into the position naturally.
Mistake: Moving the lure too fast or too far forward. This causes puppies to stand and walk forward instead of lying down. Move very slowly straight down first.
Mistake: Treating before they’re fully down. Make sure elbows and belly are on the floor, not just a play bow or crouch.
Mistake: Confusing “down” with “off.” Use “down” only for lying down. Use “off” for getting off furniture or people. Mixing these confuses your puppy.
Troubleshooting: My puppy stands up instead of lying down. Your lure is moving too far forward. Move it straight down between their paws, then only slightly forward if needed. You can also practice with their back against a wall.
Troubleshooting: My puppy does a play bow but won’t lie down completely. Hold the treat on the floor and wait patiently. Don’t give it until they’re completely down. You can also try placing the treat under a very low chair or your bent leg—they’ll need to lie flat to reach it.
Troubleshooting: My puppy gets up immediately. Build duration by counting 2 seconds before treating, then 3, then 5. Release them with “okay!” before they break position on their own.
Adding Duration and Distraction:
- Once your puppy lies down reliably, ask them to stay down for 5 seconds before treating.
- Gradually increase to 10, 15, then 30 seconds.
- Add gentle distractions like stepping side to side, clapping softly, or tossing a toy nearby (while they stay down).
- Practice “down-stay” where they must remain down while you walk around them or step away.
Reinforcing in Daily Life:
- Ask for “down” during TV time (teaching them to settle)
- Request “down” when guests arrive and your puppy is excited
- Practice at restaurants or cafés (on a mat or towel)
- Use “down” before allowing your puppy on furniture (once permitted)
- Make “down” part of the bedtime routine
Pro Tip: Teaching “Place” Combine “down” with a specific mat or bed. Say “place,” guide them to the mat, then “down.” This creates a portable calm zone—bring the mat anywhere and your puppy knows to settle there.
Command 5: Leave It
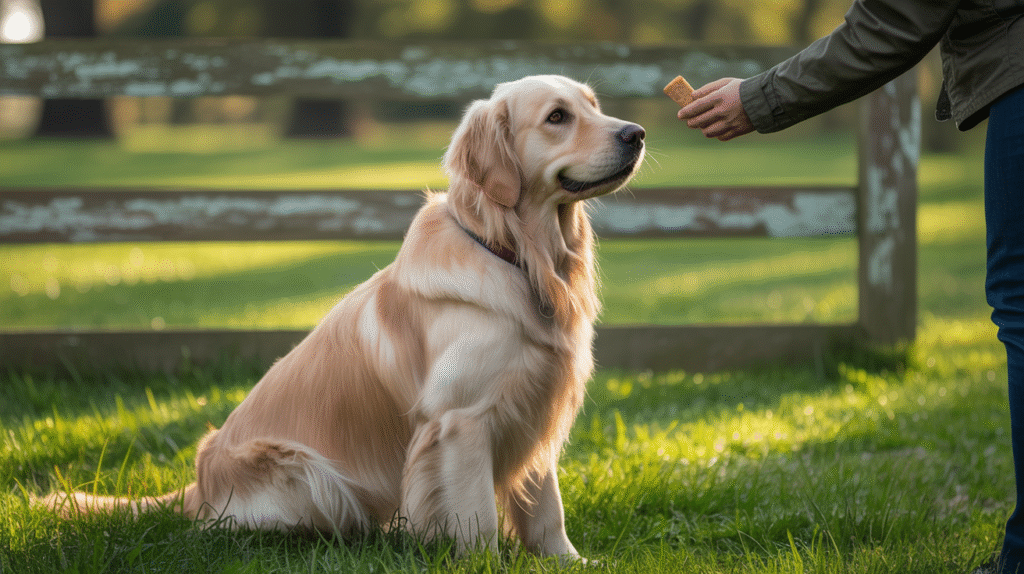
Why This Command Is Essential: “Leave it” can save your dog’s life. This command prevents your puppy from picking up dangerous items like toxic foods, medications, sharp objects, or dead animals. It’s also incredibly useful for manners—teaching your dog to ignore tempting but inappropriate items like food on coffee tables, trash on walks, or your sandwich on the counter.
Real-Life Benefits:
- Prevents ingestion of toxic substances (chocolate, xylitol, medications)
- Stops your puppy from eating dangerous items (chicken bones, sharp objects)
- Teaches impulse control around food
- Makes walks more pleasant (no stopping to eat everything)
- Protects your belongings from destructive chewing
- Essential safety command for outdoor adventures
Step-by-Step Training Instructions:
Level 1: Leave It in Your Hand
- Place a boring treat in one closed fist. Hold your fist at your puppy’s nose level.
- Your puppy will likely sniff, lick, paw, or nibble your hand. Ignore all of this. Don’t pull away or say anything—just wait.
- The moment your puppy backs away, looks away, or stops trying to get the treat, say “yes!” and give them a different, better treat from your other hand (not the one in your fist).
- Repeat 10-15 times. Your puppy is learning that ignoring the item in front of them gets them something better.
- Add the verbal cue. Once your puppy consistently backs away from your closed fist, start saying “leave it” right before opening your hand slightly.
- Gradually open your hand more until you can hold the treat in your flat, open palm and your puppy won’t take it until you say “okay” or “take it.”
Level 2: Leave It on the Floor
- Place a treat on the floor and cover it with your foot.
- Your puppy will try to get it. When they give up and look at you or back away, say “yes!” and give them a better treat from your hand.
- Repeat until your puppy immediately looks at you instead of trying to get the floor treat.
- Add “leave it” right before uncovering the treat slightly with your foot.
- Gradually remove your foot until the treat is completely exposed but your puppy waits for permission to take it.
Level 3: Leave It While Walking
- Place treats on the ground along your walking path.
- Walk your puppy toward a treat. Right before they reach it, say “leave it.”
- If they try to grab it, gently guide them away with the leash (don’t yank) and keep walking.
- When they leave it and continue walking, reward immediately with an even better treat.
- Practice with increasingly tempting items: dropped food, toys, other dogs’ toys, etc.
Level 4: Leave It at a Distance
- Toss a treat 5-6 feet away from you and your puppy.
- Say “leave it” as it lands.
- If your puppy moves toward it, step between them and the treat, blocking access.
- When they stop trying and look at you, reward with multiple treats from your hand.
- This is advanced! Only attempt after your puppy masters levels 1-3.
Common Mistakes and Troubleshooting:
Mistake: Letting your puppy have the original item. Always reward with a DIFFERENT, BETTER treat from your hand. This teaches “leave it = I get something even better.”
Mistake: Saying “leave it” after your puppy has already grabbed the item. That’s “drop it” (next command!). “Leave it” means don’t touch it in the first place.
Mistake: Using “leave it” for everything. Don’t overuse this command for minor things or your puppy will start ignoring it. Save it for times you truly need them to ignore something.
Mistake: Getting frustrated when your puppy doesn’t get it immediately. “Leave it” is counterintuitive for puppies—it means “ignore the obvious reward in front of you.” Be patient and start with easy items before moving to tempting ones.
Troubleshooting: My puppy keeps trying to get the treat even after 30 seconds. Your puppy may be too hungry. Practice after meals, not before. Also ensure your hand is completely closed and unmoving—movement attracts attention.
Troubleshooting: My puppy gets it with boring treats but not real food. You’re moving too fast. Practice for several days with boring treats before introducing more tempting items. Build the foundation first.
Reinforcing in Daily Life:
- Practice “leave it” on every walk when you pass dropped food or trash
- Use it when your puppy shows interest in the cat’s food
- Apply it to counter surfing attempts
- Practice with your own food during meals
- Use it for items on the ground during outdoor adventures
Important Distinction: “Leave It” vs. “Drop It”
- “Leave it” = Don’t touch it in the first place
- “Drop it” = Release what’s already in your mouth
Both are essential and work together!
Command 6: Drop It
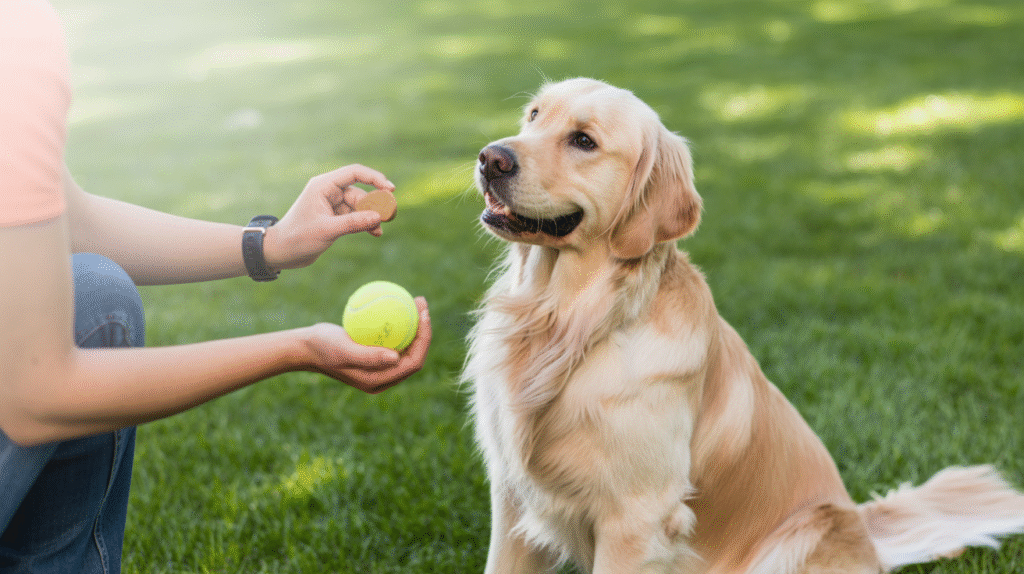
Why This Command Is Essential: While “leave it” prevents your puppy from grabbing items, “drop it” gets them to release what’s already in their mouth. This is crucial for safety (when they’ve grabbed something dangerous), for play (returning toys), and for preventing resource guarding behaviors. A reliable “drop it” means you never have to wrestle items from your puppy’s mouth or chase them around the house.
Real-Life Benefits:
- Gets your puppy to release dangerous items they’ve grabbed
- Makes fetch and tug games more fun
- Prevents resource guarding behaviors from developing
- Saves your belongings from destruction
- Reduces stress when your puppy has something they shouldn’t
- Essential for puppies who “steal” items for attention
Step-by-Step Training Instructions:
Phase 1: Trading Games (Foundation)
- Start with a low-value toy that your puppy likes but isn’t obsessed with—something they’ll willingly trade.
- Let your puppy play with the toy for 10-15 seconds.
- Show them a high-value treat (something much better than the toy). Hold it right at their nose.
- Most puppies will drop the toy to get the treat. The instant they do, say “yes!” and give the treat.
- Immediately give the toy back and let them play with it again. This is crucial—it teaches that “drop it” doesn’t mean the fun ends.
- Repeat this 5-10 times until your puppy readily drops the toy when you show the treat.
- Add the verbal cue. Start saying “drop it” right as your puppy is opening their mouth to release the toy.
Phase 2: Naming the Behavior
- Now say “drop it” first, then show the treat.
- If your puppy drops the toy, reward immediately and return the toy.
- If they don’t drop it, show the treat but don’t give it until they release. Be patient—wait them out.
- Gradually phase out showing the treat first. Say “drop it,” wait 2 seconds, then show the treat if needed.
Phase 3: Higher Value Items
- Once reliable with regular toys, practice with slightly more exciting items like rope toys, squeaky toys, or balls.
- Use even better treats for more valuable items—real chicken, cheese, or hot dog pieces.
- Always return the item or start a game after they drop it (unless it’s truly dangerous). This prevents them from learning to guard items.
Phase 4: Adding Distance
- Practice “drop it” during fetch. When your puppy returns with the ball, say “drop it” before taking it to throw again.
- Don’t grab at items. Let your puppy drop them voluntarily. Grabbing can trigger guarding behaviors.
- Practice during tug games. Periodically say “drop it,” reward when they release, then start tugging again. This teaches great sportsmanship!
The “Take It” and “Drop It” Game
This game builds reliability:
- Say “take it” and let your puppy grab a toy
- Play for 10-15 seconds
- Say “drop it” and wait for the release
- Reward with a treat
- Say “take it” and give the toy back
- Repeat 5-10 times
Your puppy learns that dropping things gets them treats AND the toy back—win-win!
Common Mistakes and Troubleshooting:
Mistake: Chasing your puppy when they have something. This turns it into a game of keep-away. Instead, trade for something better or move away from them (often they’ll follow).
Mistake: Never giving the item back. If every time means losing the toy forever, your puppy will start running away or guarding. Return items frequently.
Mistake: Wrestling items from your puppy’s mouth. This can cause resource guarding and makes your puppy grip tighter. Always trade, never force.
Mistake: Using “drop it” as punishment. Say it calmly and neutrally, not angrily. Your puppy should have positive associations with this command.
Troubleshooting: My puppy runs away when they have something. Stop chasing. Instead, run away from them or get a treat bag and shake it (the sound often brings them running). Practice “drop it” more with low-value items first.
Troubleshooting: My puppy drops it but immediately picks it back up. You’re not rewarding fast enough. The treat should arrive within 1 second of dropping. Also, try putting your foot over the item after they drop it so they can’t immediately grab it again.
Troubleshooting: My puppy growls when I ask them to drop something. This is the beginning of resource guarding. Stop trying to take items directly. Only trade, never force. Consult a professional trainer if growling continues or escalates.
Reinforcing in Daily Life:
- Practice during every fetch or tug session
- Use “drop it” when your puppy picks up sticks, leaves, or outdoor items during walks
- Apply it when they grab laundry, shoes, or household items
- Make it part of toy rotation (drop one toy to get another)
- Practice with meal items—have them drop a piece of kibble for a treat, then give the kibble back too
Pro Tip: The “Two Toy” Game Keep two identical toys. When your puppy has one, show the other and say “drop it.” When they drop the first toy, immediately throw the second one. They learn that dropping means more play, not less!
Command 7: Heel (Loose Leash Walking)
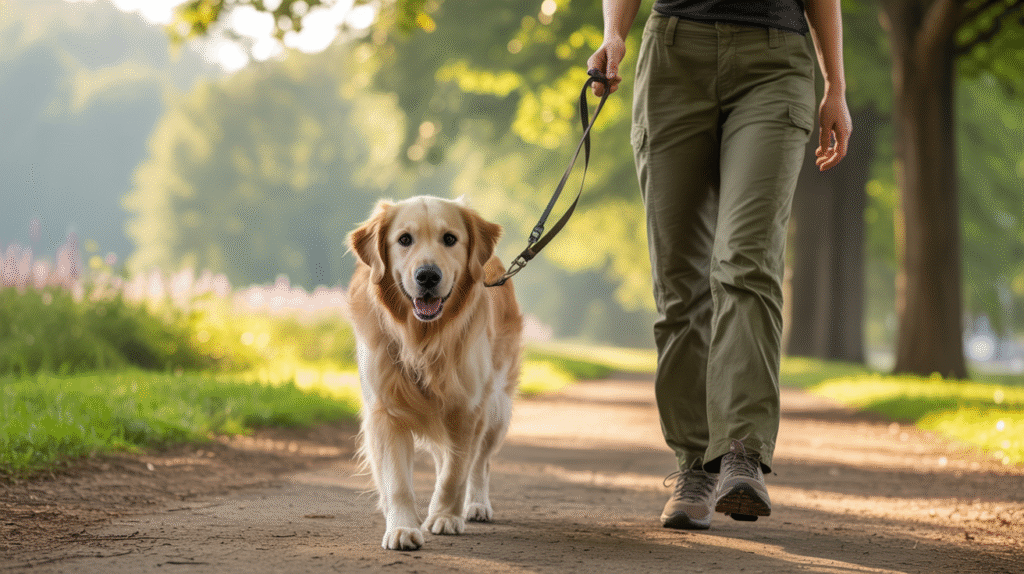
Why This Command Is Essential: Few things are more frustrating than a puppy who pulls on the leash during walks. “Heel” or loose leash walking teaches your puppy to walk politely beside you without pulling, making walks enjoyable instead of exhausting. This command is essential for your comfort, your puppy’s safety, and ensuring you actually want to take daily walks together.
Real-Life Benefits:
- Makes walks pleasant instead of a arm-workout
- Keeps your puppy safe and close to you
- Prevents injuries from pulling (for both of you)
- Allows you to maintain control in busy areas
- Makes it possible to walk your dog even when they’re larger and stronger
- Essential foundation for off-leash walking eventually
Important Note: “Heel” technically means your dog walks at your left side with their shoulder aligned with your leg. For most pet owners, “loose leash walking” (walking without pulling, on either side) is the practical goal. We’ll teach both approaches.
Step-by-Step Training Instructions:
Foundation: The Name Game
Before teaching formal heeling, teach your puppy that walking near you is rewarding:
- In a quiet room indoors, take a few steps.
- When your puppy is walking near you (doesn’t have to be perfect position), say their name.
- When they look at you, immediately reward with a treat at your side.
- Take a few more steps and repeat. You’re teaching them that being near you and checking in gets rewards.
- Practice this for 2-3 days before adding leash work.
Method 1: Be a Tree (For Pullers)
- Start walking with your puppy on leash in a quiet area.
- The moment the leash gets tight (they start to pull), stop walking completely. Stand still like a tree.
- Don’t pull back or say anything. Just wait.
- When your puppy stops pulling and the leash loosens (even if they just turn to look at you), immediately start walking again.
- The reward is forward movement. Pulling = we stop. Loose leash = we continue.
- This can be tedious at first with many stops, but consistency pays off. Most puppies learn within 2-3 weeks.
Method 2: Lure Position (Teaching Heel)
- Hold treats in your left hand at your thigh.
- Take one step forward. If your puppy stays beside you, immediately reward at your hip (not in front of you).
- Take another step. Reward if they’re still in position.
- Gradually increase to 2 steps, then 3, then 5 before rewarding.
- Add “heel” or “let’s walk” once your puppy is consistently staying in position.
- Practice in straight lines first, then add turns.
Method 3: Follow the Rewards (Engagement Method)
- Keep high-value treats in a treat pouch at your waist.
- Start walking and frequently (every 2-3 steps initially) give your puppy a treat when they’re near your side.
- Gradually space out treats—every 4 steps, then 6, then 10, then randomly.
- Your puppy learns to stay near you because that’s where rewards appear.
- Add verbal marker “yes!” right before treating to mark the exact position you want.
Adding Turns and Changes of Direction:
- When your puppy pulls ahead, immediately turn and walk in the opposite direction without warning.
- When they catch up and are at your side, reward enthusiastically.
- This teaches them to pay attention to where you’re going.
- Practice random direction changes during walks—left, right, U-turns. Reward when they stay with you.
Common Mistakes and Troubleshooting:
Mistake: Using a retractable leash. These encourage pulling. Use a standard 4-6 foot leash for training.
Mistake: Holding the leash too short. Keep a slight J-shaped curve in the leash. Holding it tight creates constant tension.
Mistake: Rewarding in front of you. Always reward at your hip/thigh, not in front. You want your puppy beside you, not leading.
Mistake: Only practicing on “real” walks. Dedicate specific short training sessions (5-10 minutes) just for leash work in low-distraction areas.
Mistake: Inconsistency. If you sometimes let them pull and sometimes don’t, they’ll keep testing. Be consistent every single walk.
Troubleshooting: My puppy still pulls constantly. You may be progressing too fast. Practice in your living room with no distractions first. Also, ensure your puppy is getting enough exercise—a tired puppy is easier to train.
Troubleshooting: My puppy is perfect in the yard but pulls on walks. The outdoor world is more exciting! This is normal. Practice in gradually more distracting environments: quiet driveway, quiet street, busier street, park.
Troubleshooting: My puppy lunges at other dogs or people. This is reactivity, not just pulling. Work on “look at me” command and consider consulting a professional trainer for reactivity-specific training.
Troubleshooting: My puppy sits down or refuses to walk. They may be overwhelmed, scared, or overtired. Don’t drag them. Use treats to encourage movement, practice in less scary locations, and ensure they’re not exhausted.
Building Duration:
- Week 1: Practice 5-10 steps of nice walking
- Week 2: Practice 20-30 steps
- Week 3: Practice walking to the end of your driveway and back
- Week 4: Practice around the block
- Gradually increase distance as success continues
Reinforcing in Daily Life:
- Every walk becomes practice—no exceptions
- Practice during high-distraction times (when other dogs are out) for extra challenge
- Occasionally let your puppy sniff on a “free” command for mental stimulation
- Use spontaneous rewards (sometimes treat for nice walking even when you didn’t ask)
- Practice in different locations: parking lots, parks, pet stores
Pro Tips:
Sniff Breaks: Allow designated “sniff breaks” where your puppy can explore. Say “okay, go sniff!” This prevents them from constantly pulling to smell things while still maintaining control.
Vary Your Pace: Sometimes walk fast, sometimes slow. This keeps your puppy engaged and paying attention to you.
Treat Scatter: Occasionally toss a few treats on the ground near you. When your puppy finishes, they’ll naturally look up at you—reward that attention!
General Training Tips for Success
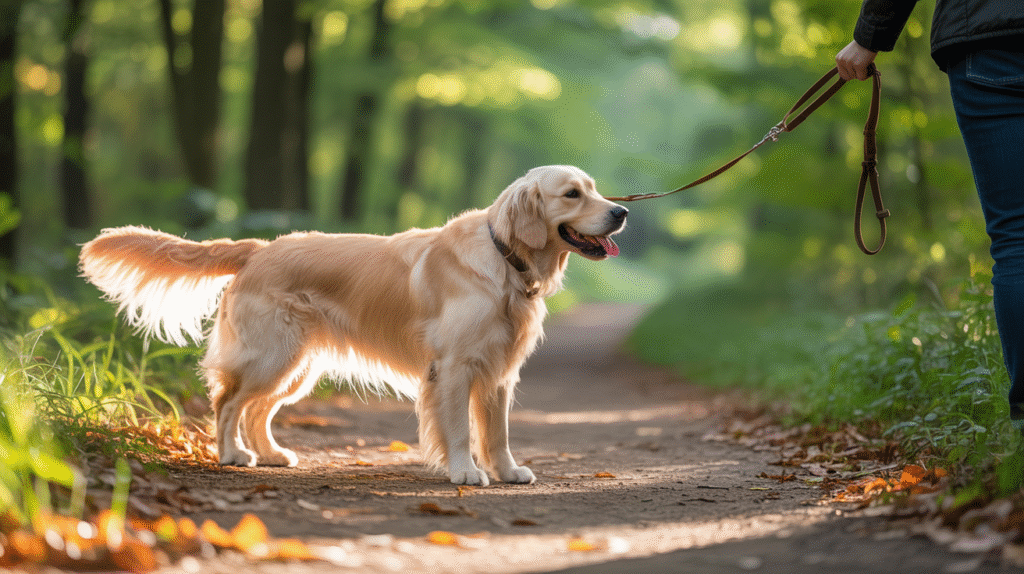
Now that you know the seven essential commands, let’s talk about how to make your training sessions effective and enjoyable for both you and your puppy.
The Power of Positive Reinforcement:
Modern dog training is based on positive reinforcement—rewarding behaviors you want to see more of. This approach is more effective, creates a stronger bond, and is more enjoyable than punishment-based methods.
Why positive reinforcement works:
- Dogs repeat behaviors that result in good things
- Creates positive associations with training
- Builds confidence instead of fear
- Strengthens your relationship
- Results in reliable, enthusiastic obedience
Keep Training Sessions Short and Fun:
Puppies have short attention spans—typically 5-10 minutes maximum. Multiple short sessions throughout the day (3-5 sessions of 5 minutes each) are far more effective than one long, exhausting session.
Signs your puppy is done:
- Looking away or around instead of at you
- Lying down or wandering away
- Sniffing the ground excessively
- Getting the same command wrong repeatedly
- Seeming frustrated or stressed
End on a high note: Always finish with something your puppy knows well so you can reward them and end positively.
Timing Is Everything:
Rewards must come within 1-2 seconds of the desired behavior. This is why clicker training is popular—the click sound marks the exact moment of good behavior, even if the treat takes a few seconds to deliver.
Consistency Across the Board:
- Same words: Everyone uses the same command words
- Same rules: If sitting before meals is required, it’s required every time, from everyone
- Same rewards: High-value treats for difficult commands, praise for easy ones
- Same consequences: Ignore unwanted behavior consistently
Best Training Treats:
Your treats should be:
- Small (pea-sized or smaller—you’ll use many!)
- Soft (quick to chew and swallow)
- Smelly and tasty (more motivating than dry kibble)
- Healthy (you’ll use a lot, so avoid junk)
Great options:
- Small pieces of real chicken, turkey, or beef
- String cheese torn into tiny pieces
- Hot dogs cut into small cubes
- Commercial training treats (Zuke’s, Wellness, True Chews)
- Freeze-dried liver
- Small pieces of banana or blueberries (for dogs who like fruit)
Recommended Training Tools:
- Treat pouch: Worn at your waist for easy access
- Clicker: Marks exact moment of correct behavior
- 6-foot leash: Standard length for training
- Long line (15-30 feet): For recall practice
- High-value treats: As listed above
- Favorite toys: For play rewards
Training Environment Progression:
Start in the easiest environment and gradually increase difficulty:
- Quiet indoor room with no distractions
- Different rooms in your house
- Backyard with mild distractions
- Front yard with more distractions
- Quiet street or parking lot
- Busier locations with people, dogs, sounds
- High-distraction environments like parks or pet stores
Never skip levels—build success gradually!
Frequently Asked Questions
At what age should I start training my puppy?
You can and should start training the moment you bring your puppy home, even at 8 weeks old! Puppies are learning constantly whether you’re intentionally training or not, so you might as well teach them good behaviors from day one. The critical learning window is 8-16 weeks, making this the perfect time for basic commands. Keep sessions very short (2-3 minutes) for young puppies and make everything fun and game-like.
What if my puppy isn’t responding to training?
First, troubleshoot these common issues:
- Are treats motivating enough? Try higher-value rewards
- Are sessions too long? Shorten to 3-5 minutes
- Is the environment too distracting? Move to a quieter location
- Are you training when they’re tired or overstimulated? Try after a nap
- Is your timing off? Reward within 1-2 seconds of the behavior
- Are expectations too high too fast? Break the command into smaller steps
If issues persist after addressing these, consider consulting a professional trainer.
How long does it take for a puppy to master a command?
This varies widely based on the command’s difficulty, your consistency, and your puppy’s age and breed. General timeline:
- Sit: 1-2 weeks to reliable
- Down: 2-3 weeks to reliable
- Stay: 3-4 weeks for short durations, months for long durations with distractions
- Come: 2-3 weeks for indoor reliability, months for outdoor/distraction reliability
- Leave it/Drop it: 2-4 weeks to reliable
- Heel: 4-8 weeks for basic loose leash walking, months for perfect heel
Remember: “mastered” means responding correctly 90% of the time in various environments. Practice must continue even after initial learning.
Can I train different commands at the same time?
Yes! In fact, it’s good to work on multiple commands. This prevents boredom and helps your puppy generalize their learning. However:
- Focus on one new command per training session
- Don’t introduce more than 2 new commands in the same week
- Make sure your puppy knows sit well before adding stay
- Teach leave it and drop it together—they complement each other
Are these commands safe for all breeds and ages?
Yes, these seven commands are appropriate for all breeds, sizes, and ages (starting at 8 weeks). However:
- Brachycephalic breeds (pugs, bulldogs) may need extra breaks due to breathing
- Giant breeds should avoid excessive “down” practice on hard surfaces while growing (protect joints)
- Very young puppies (8-10 weeks) need shorter sessions
- Senior dogs learning for the first time may need more patience and repetition
Always consult your vet if your puppy has physical limitations.
Should I use a clicker or just verbal praise?
Both work! Clickers are excellent because:
- They mark the exact moment of correct behavior
- The sound is consistent (unlike human voices)
- They’re unemotional and clear
However, verbal markers (“yes!” or “good!”) also work well if used consistently. Many trainers use both—clicker for precision timing during initial learning, then transition to verbal markers once the command is learned.
How often should I practice these commands?
Daily practice is essential, but it doesn’t have to be formal:
- Structured training: 3-5 short sessions (5-10 minutes each) daily
- Throughout the day: Ask for commands before meals, treats, going outside, playtime, etc.
- On walks: Practice heel, leave it, and sit constantly
- During play: Work on come, drop it, and down
The more you integrate commands into daily life, the more reliable they become.
My puppy knows commands at home but ignores them outside. Why?
This is called “lack of generalization.” Your puppy has learned that “sit” means sit in the kitchen, but hasn’t generalized that “sit” means sit everywhere. To fix this:
- Practice every command in multiple locations
- Start with low-distraction outdoor environments
- Use higher-value treats outdoors than indoors
- Be patient—outdoor learning takes longer
- Gradually increase environmental difficulty
Think of it like learning a language—just because you can speak French in a classroom doesn’t mean you’re ready for Paris! Your puppy needs practice in real-world situations.
Troubleshooting Common Training Challenges
Challenge: My Puppy Gets Distracted Easily
Solution:
- Train in a boring, quiet environment first
- Keep sessions very short (3-5 minutes)
- Use extra-smelly, delicious treats
- Practice focus exercises: reward your puppy for simply looking at you
- Gradually add distractions as your puppy succeeds
- Train before walks or playtime when they’re not overstimulated
Challenge: My Puppy Seems Stubborn or Uninterested
Solution:
- “Stubborn” is often code for “unmotivated” or “confused”
- Find better rewards—not all puppies care about kibble
- Try toys as rewards if your puppy isn’t food-motivated
- Break commands into smaller steps
- Make training more fun and game-like
- Ensure your puppy isn’t tired, hungry, or needing to potty
- Some breeds are more independent—adjust expectations
Challenge: Different Family Members Get Different Results
Solution:
- Hold a family training meeting to align on methods
- Everyone uses the same words for commands
- Everyone uses the same hand signals
- Everyone follows the same rules (if one person allows jumping, puppy will keep trying)
- Have the less successful person do more training sessions
- Watch each other train to identify differences in approach
Challenge: My Puppy Regressed and “Forgot” a Command
Solution:
- This is normal! Learning isn’t linear
- Go back to basics—practice in easy environments
- Increase reward frequency temporarily
- Ensure nothing scary happened during training
- Some regression happens during fear periods (8-10 weeks, 6-8 months, 12-18 months)
- Be patient and rebuild—it comes back faster the second time
Challenge: My Puppy Only Obeys When I Have Treats
Solution:
- This means you’re still in the learning phase—that’s okay!
- Gradually move to intermittent reinforcement (don’t treat every single time)
- Start treating randomly: sometimes the 1st sit, sometimes the 3rd, sometimes the 5th
- Add “life rewards”: obedience earns play, walks, attention, not just food
- Fade treats slowly over weeks/months, not days
- Always keep occasional treats—even trained dogs need reinforcement
When to Seek Professional Help:
Consider consulting a certified professional dog trainer (CPDT-KA) if:
- You’ve been consistent for 3-4 weeks with no progress
- Your puppy shows fear or anxiety during training
- Your puppy shows aggression (growling, snapping) related to commands
- You feel frustrated, overwhelmed, or out of your depth
- Your puppy has specific behavioral issues beyond basic commands
- You want to pursue advanced training or dog sports
Red flags in trainers to avoid:
- Use of punishment, shock collars, or “alpha” dominance methods
- Unwillingness to explain their methods
- Guarantees of specific timelines
- Working only with the dog, not teaching you
- No certifications or credentials
Good trainers will:
- Use positive reinforcement methods
- Teach YOU how to train your dog
- Be patient and encouraging
- Have credentials (CPDT-KA, CBCC-KA, or similar)
- Provide references or reviews
- Offer a clear training plan
Conclusion: You’ve Got This!
Congratulations! You now have a complete roadmap for teaching your puppy the seven most essential commands. These aren’t just tricks to impress your friends—they’re life skills that will keep your puppy safe, make your life together more enjoyable, and build a foundation of communication and trust.
Remember the key principles:
- Start early but keep it fun and age-appropriate
- Be consistent in words, actions, and expectations
- Keep sessions short—quality over quantity
- Reward generously with treats, praise, and play
- Practice daily by integrating commands into real life
- Progress gradually from easy to challenging environments
- Celebrate small wins—every success deserves recognition
- Be patient—learning takes time and isn’t always linear
Your Action Plan:
This Week:
- Choose one command to start with (we recommend “sit”)
- Stock up on high-value training treats
- Practice 3-5 short sessions daily
- Integrate the command into daily activities
This Month:
- Add 2-3 more commands to your rotation
- Practice in multiple locations around your home
- Start generalizing to outdoor environments
- Join a puppy kindergarten class if available
Next Three Months:
- Work toward reliability with all seven commands
- Practice in increasingly distracting environments
- Build duration and distance for stays
- Proof recall in safe, enclosed areas
- Begin loose leash walking on actual walks
Throughout Your Dog’s Life:
- Continue practicing commands regularly
- Keep training fun and rewarding
- Add new challenges and environments
- Consider advanced training or dog sports
- Never stop learning together!
The journey of training your puppy is one of the most rewarding experiences you’ll have together. Yes, there will be frustrating moments when they just won’t sit or they pull you down the sidewalk. But there will also be magical moments when everything clicks, when your puppy looks at you with understanding, when they come racing back to you at the dog park, when they politely sit while greeting a stranger.
Every single training session—even the ones that feel unsuccessful—is building your relationship. You’re learning your puppy’s personality, and they’re learning to trust and understand you. Training isn’t about creating a perfectly obedient robot; it’s about building communication, trust, and partnership.
Now It’s Your Turn!
Which command are you most excited to teach first? What’s been your biggest training challenge so far? Drop a comment below and share your puppy training journey—we’d love to hear about your successes and struggles!
Found this guide helpful? Pin it to your “Puppy Training” or “Dog Tips” board so you can reference it whenever you need a refresher. Share it with other new puppy parents who might be feeling overwhelmed—we’re all in this together!
Continue Your Puppy Training Journey:
- 5 Quick Tips to Stop Puppy Biting for Good
- Complete Puppy Potty Training Guide
- Puppy Socialization Checklist: 100+ Experiences
- How to Choose the Right Puppy Training Class
- Understanding Puppy Body Language
Remember: The best time to start training was the day you brought your puppy home. The second best time is right now. Grab some treats, call your puppy, and let’s get started. You’ve got this, and your puppy is lucky to have such a dedicated parent!
Here’s to many happy years with your well-trained, wonderful companion!
Disclaimer: This article provides general puppy training guidance and is not a substitute for professional dog training services. Every puppy is unique, and some may require individualized approaches. Consult with a certified professional dog trainer (CPDT-KA) or veterinary behaviorist for specific concerns or challenges.
SOURCES & FURTHER READING
- American Veterinary Medical Association (AVMA): https://www.avma.org
- American Kennel Club (AKC) Puppy Training Tips: https://www.akc.org/expert-advice/training/basic-training/
- PetMD: “How to Teach Dog Commands” https://www.petmd.com/dog/training
- ASPCA: Dog Training Basics https://www.aspca.org/pet-care/dog-care/dog-training-tips

